Introduction
In the previous posts, we have covered many topics that either relate to each other or build upon one another. Such as my recent follow-up with Advanced Targeting that built upon the basics from the Targeting Best Practices. Today, we will be diving into WiFi configuration which having previous understanding of the NetBeez dashboard layout is very helpful here!
Getting set-up
Deploying a WiFi agent is relatively straight forward, however if it’s your first time deploying any agent, there are a few things you need to consider:
- Is your license configured to support the required amount of agents?
- Are your firewall rules up to date?
- Can you plug into a network switch for the deployment?
Once all of these are verified, you’re ready to go! All you need to do is connect directly into the network via ethernet and the agent should appear on the dashboard in a minute or so. If you don’t see it, follow this troubleshooting guide first, it’s usually firewall related but if none of those help, email support@netbeez.net.
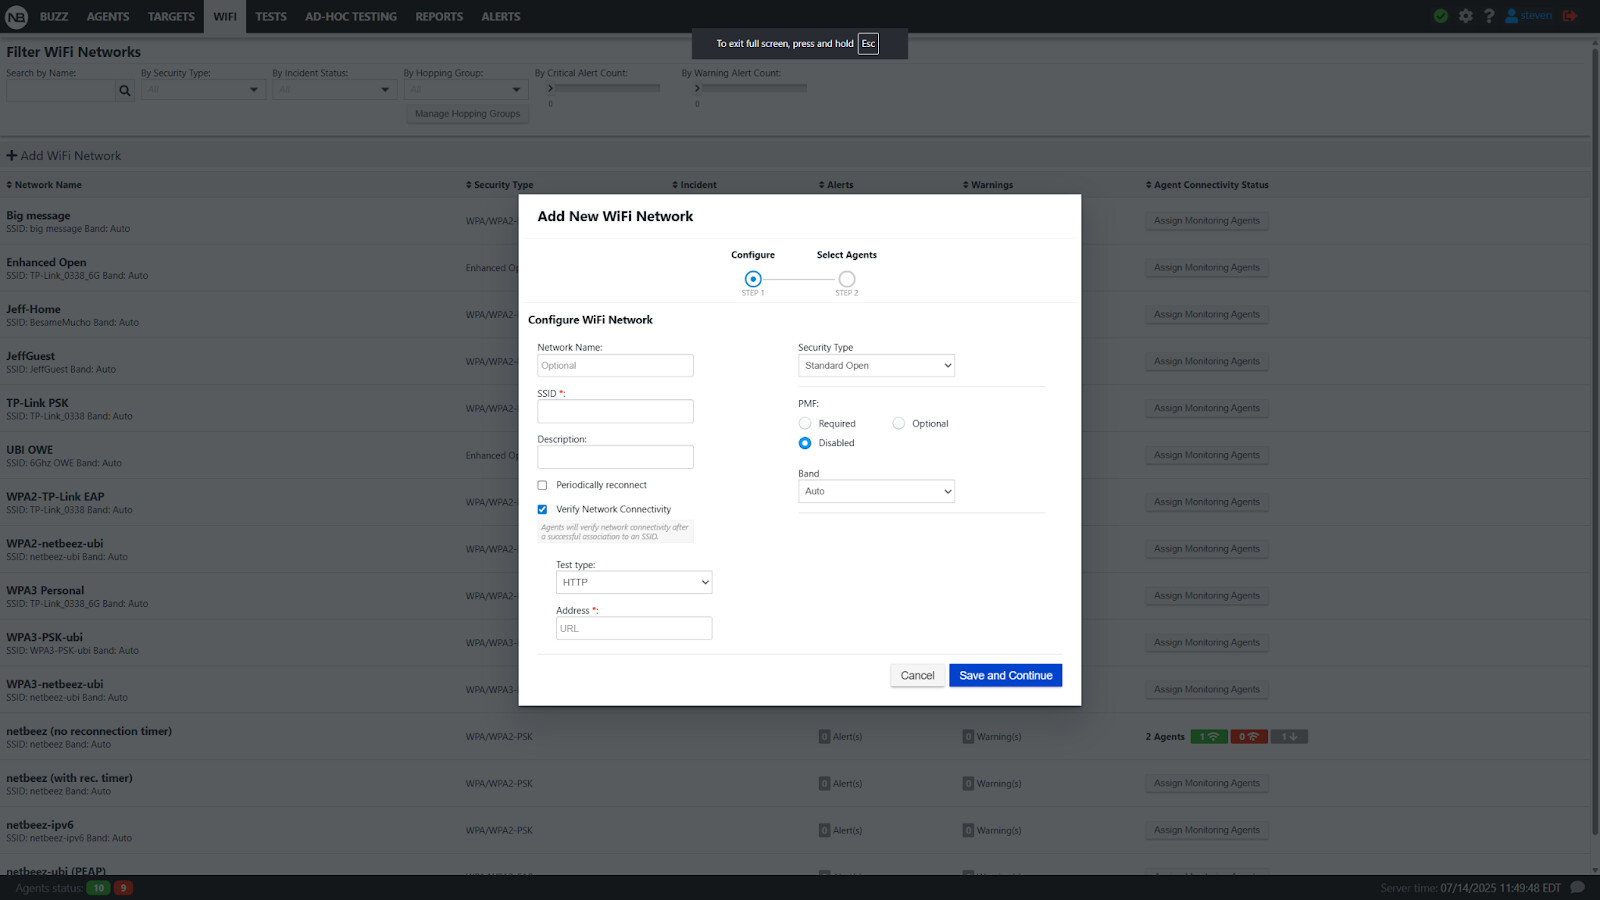
Now we want to join the network. Navigate to the WiFi Tab > “+ Add WiFi Network” and from there you have quite a few options. These include:
- Network Name (Optional)
- SSID
- Description (Optional)
- Periodically reconnect/Verify Network Connectivity (Optional)
- Security Type
- Band
Optionals?
Yes, there are several optional aspects to the configuration. They are there to allow as much granularity especially for managing and tracking as. One is more involved which we will cover but below are the simple ones:
- Network Name - A unique way to identify the network other than just the SSID
- Description - Adding additional context
- Verify Network Connectivity - Performs a simple HTTP Get or Ping test to verify it’s receiving a valid response
- Band - By default it will select auto which will typically rely on what the AP is pushing. But you can force 2.4GHz, 5.0Ghz or 6.0GHz (WiFi 6e ONLY)
The Periodically Reconnect feature will allow you to test not only the connection KPI’s but also the user experience as well. This will intentionally disconnect from the network and attempt to reconnect. You will be supplied with metrics such as: Association, Authentication and DHCP as well as the WPA supplicant logs at the bottom. The periodically reconnect times are as follows:
Security Types
There are 4 standards of security with anywhere from 2-3 options each. This will greatly depend on your network requirements and needs. They are as follows:
- Standard Open
- Open
- Enhanced
- WEP
- WEP64
- WEP128
- WEP256
- WPA2
- PSK
- EAP
- WPA3 (NetBeez WiFi 6e Agent ONLY)
- PSK
- EAP
The most common we see are going to be Open (usually guest) or WPA2/3. PSK is going to be a standard login with a preshared key and EAP will be certificate based authentication. If you plan on going with either PSK or EAP, you’ll need either of these prior to configuration.

Once you have configured everything the way you want it, you need to select the agents or the groups. I recommend configuring by groups as it’s easier to manage larger scale changes this way but depending on your setup, future plans and how you’re going to use these sensors, your mileage may vary.
Hopping Groups
A hopping group is a group of WiFi networks that agent(s) can switch between. An agent can typically hop between 2 to 4 different SSIDs on fixed intervals to test both the connection timings between 2 different networks as well as real time testing data as well (Ping, DNS, HTTP, Traceroute and Path Analysis). These test results are reported separately that you’ll see below as it’s broken up by SSID in the Agent view. Do remember, each SSID will count each test, so if you have 25 tests configured hopping between 2 SSIDs, that is 50 tests.
To configure these, navigate to the WiFi Tab> “Manage Hopping Groups” > “Create Hopping Group”. From here you need a simple name/description then on the next page you select anywhere from 2 to 4 SSIDs as below:

From there you’ll have to choose from a list of intervals and then you can assign by groups or individual agents.

Hopping groups play a special role in a NetBeez deployment and typically it is not recommended to have every agent hop around unless your only concern is connecting to the WiFi. Having a few agents dedicated to hopping is usually recommended. And let the remaining agents stay on a single network so real time data can be used to report issues and outages as well as performance degradation. While an agent can do this while hopping, the time it takes to move between networks, the agents are not actively testing and gathering data.
Configuring Targets?
The good news is, you shouldn’t have to make changes to the targets in MOST scenarios, especially if this is a brand new configuration. By default, each target is automatically configured to run on WiFi only.With that said, our smart logic built into the dashboard will follow what the operating system dictates if that NIC is not available. So for Wired agents, they will ignore that entirely and run the tests on the wired and WiFi agents will run tests on WiFi only.
If you want to configured to run on both wired and wireless, you will either edit an existing test by navigating to Targets > select the target > click the cog > edit target OR navigate to Targets > + Add Target > Custom Target, configure your target and check this option on the next page. At the bottom you will see options for Wired and Wireless.

If you configure both Wired & Wireless, the agent will run the test on both NICs at the same time reporting separately. It will specify each section NIC as well as each WiFi network (if configured for hopping groups) and report them separately. This is crucial because you can see in the picture below (Agent Detail View) how different the results are just between the agent to the gateway across 2 NICs and 2 networks.

One thing to remember is, if the test was already configured to run specifically on wired, the test will run on the WiFi agent over the wired NIC (if the agent is connected to a switch). Otherwise it will fail due the test. One other thing to consider is, if the wireless network is on guest and the wired NIC is on the corporate network, the DNS servers may be different, so you won’t be able to run DNS tests on both NICs unless the wireless is on the same network.
Advanced Agent Configuration
On a per agent basis, you can make configuration changes that include a wide range of settings. I CANNOT stress this enough, ONLY make these changes if the agent is connected to a switch that is on the network. And only make these changes once everything is finalized and working correctly.
Navigate to the Agents Tab > Select the Agent > Click the Cog > Interface Management. Here you can edit both eth0 AND wlan0. For this example we will focus on the WiFi NIC. From there you can change the SSID, force a specific band, and select a specific BSSID (Access Point) to connect to and the frequency and channel options as well.
Lastly, you can configure a static IP by turning DHCP off. This will allow you to edit every field except IPv6. Any mistakes made on this will most likely require a DHCP reset, so this is only advised if you are comfortable with making these types of changes.

Where to Deploy?
While that depends mostly on your network and needs, there are some best practices I recommend on how to deploy wifi monitoring sensors:
- Try to get plugged into a switch if possible (that way they are reachable regardless of WiFi connection)
- Deploy in high traffic areas where complaints come from
- Avoid line of sight issues to the AP
- Avoid going through thick materials (concrete, steel, etc)
- Don’t deploy in a networking closet
- Deploy high away from where they can grow legs and walk away
Mistakes to Avoid
I say this from experience, don’t try to do everything all the time. A periodic reconnect every 5 minutes is fine, but only if you have dedicated agents handling this. Setting this up for all agents will have gaps in testing, reporting and potential alerting. Another thing to remember is to consider the Scheduled Tests. Real time testing pauses during a scheduled test (Speed Test, Iperf, VoIP). And you also may want to consider how to schedule these if the agent is set up in a hopping group. You may end up with mixed results or every test only runs on 1 SSID, which may be intentional or not. Have a focused plan for each and every agent, making sure it’s in a good location to connect to an AP but also located in areas of complaints.
Conclusion
WiFi monitoring is probably one of the highest demand products we’ve seen the past few years. With going from in-office>remote>hybrid, it seems that there are ever changing needs from our customers. Hopefully this will set you up with the basics to get started and if you want to learn more or have a suggestion for a future post, please let me know!